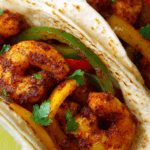
If you love seafood and are looking for a quick and flavorful way to prepare shrimp, the Air Fryer Garlic Butter Shrimp is a perfect choice. With a delicious buttery garlic sauce and perfectly crisped shrimp, this dish is a game-changer. It’s so easy to make that you’ll wonder why you didn’t try it sooner. The best part? It’s ready in just 10 minutes, making it a fantastic weeknight meal or a speedy appetizer for your next gathering.
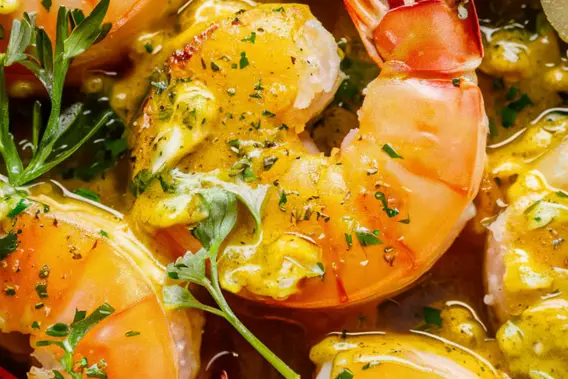
The air fryer ensures that the shrimp come out tender on the inside with a golden, crispy exterior. Paired with the rich garlic butter sauce, every bite is bursting with flavor. Whether you’re craving a light dinner or something to serve alongside pasta, rice, or even a salad, this recipe is versatile and a crowd-pleaser. Let’s dive into what you need to make this delicious dish!
What You Need to Make This Recipe
Shrimp: Shrimp is the star of this dish! You’ll want to use large or extra-large shrimp for this recipe, as they hold up better in the air fryer and have a delightful texture. Make sure to peel and devein the shrimp if it hasn’t been done already.
Butter: Butter is the foundation of the garlic butter sauce. It adds richness and flavor to the shrimp, helping the garlic and seasonings stick to the shrimp while they cook.
Garlic: Fresh garlic is a must for that bold, savory taste in the sauce. Mince the garlic finely to ensure it releases all its delicious aroma and flavor when combined with the butter.
Olive Oil: A touch of olive oil adds richness and helps the butter to coat the shrimp evenly. It also gives the shrimp a nice golden color when air-fried.
Lemon Juice: A squeeze of fresh lemon juice adds a burst of brightness that balances the richness of the butter and complements the shrimp perfectly.
Parsley: Fresh parsley gives a pop of color and a fresh, herby flavor that enhances the overall dish. It’s perfect for garnishing the shrimp before serving.
Seasonings (Salt & Pepper): Simple but essential, salt and pepper bring out the natural flavors of the shrimp and the garlic butter sauce.
Ingredients List
- 1 pound large shrimp (peeled and deveined)
- 4 tablespoons unsalted butter
- 4 cloves garlic (minced)
- 1 tablespoon olive oil
- 1 tablespoon fresh lemon juice
- 1 tablespoon chopped fresh parsley
- Salt and pepper to taste
How to Make Air Fryer Garlic Butter Shrimp
Step 1: Prepare the Shrimp
Start by rinsing the shrimp under cold water and patting them dry with a paper towel. This helps the seasonings and butter to stick better. Place the shrimp in a bowl, and season with salt and pepper. Set the shrimp aside while you prepare the garlic butter sauce.
Step 2: Make the Garlic Butter Sauce
In a small microwave-safe bowl, combine the butter and olive oil. Microwave for about 30 seconds or until the butter is melted. Add the minced garlic and lemon juice to the bowl, and stir to combine. This creates your garlic butter sauce that will coat the shrimp and give them a rich, flavorful taste.
Step 3: Coat the Shrimp
Pour the garlic butter sauce over the shrimp and toss to coat evenly. You can also marinate the shrimp for 10-15 minutes if you want to allow the flavors to meld together more intensely.
Step 4: Air Fry the Shrimp
Preheat your air fryer to 400°F (200°C) for about 5 minutes. Arrange the shrimp in a single layer in the air fryer basket. You may need to cook the shrimp in batches depending on the size of your air fryer. Cook the shrimp for 5-6 minutes, flipping halfway through, until they are golden brown and cooked through.
Step 5: Garnish and Serve
Once the shrimp are cooked, remove them from the air fryer and transfer them to a serving platter. Drizzle any remaining garlic butter sauce over the top and garnish with fresh parsley. Serve immediately with a wedge of lemon on the side.
Tips for Making This Recipe
- Don’t Overcrowd the Basket: For the shrimp to cook evenly and crisp up nicely, make sure not to overcrowd the air fryer basket. It’s better to cook in batches if you have a lot of shrimp.
- Adjust the Garlic to Taste: If you love garlic, feel free to add an extra clove or two. Just be sure to mince it finely so it cooks evenly and doesn’t burn in the butter.
- Serve with Sides: This shrimp pairs wonderfully with rice, pasta, or a fresh salad. You can also serve it as an appetizer with a dipping sauce.
- Use Fresh Lemon Juice: For the best flavor, use fresh lemon juice instead of bottled. It adds a bright, tangy flavor that complements the butter perfectly.
FAQs
Can I use frozen shrimp for this recipe?
Yes, you can use frozen shrimp! Just be sure to thaw them completely before cooking. You can place the shrimp in a bowl of cold water for about 15 minutes to speed up the thawing process.
Can I make this recipe ahead of time?
It’s best to cook the shrimp fresh, as they taste best right after they’re made. However, you can prepare the garlic butter sauce ahead of time and store it in the fridge for a few days.
How do I know when the shrimp are done?
Shrimp cook quickly and should be pink and opaque when they’re done. The internal temperature should be 120°F (49°C). They should be firm to the touch but not rubbery.
What can I serve this shrimp with?
This shrimp goes great with a variety of sides, such as steamed vegetables, garlic bread, or a refreshing green salad. You could also serve it over a bed of rice or pasta for a heartier meal.